Dockerizing a Node Application
I’ve been hearing good things about Docker ever since I started working professionally as a web developer. However, a lot of the deployment process was abstracted from me. The projects I worked on were mature and had an established workflow. The code I pushed up to Github will end up magically working on the staging server and then to production. A few weeks ago I was given the opportunity see a new project grow through its infancy. I saw a lot of problems with getting a project working locally to work on production. Something would break every few pushes and time would be wasted getting the devleopers and system administrators together to figure out a solution. After hearing so many good things about Docker and how it aims to solve the problems we were having in production, I suggested that we use Docker to develop our application and ship it to production.
Knowing absolutely nothing about Docker, these are the problems I faced and the references I used to figure out a workflow for our developers. This is yet another blog post where I jot down my thoughts and decision making, and not really walking through anything.
Why Use Docker?
We all develop on OSX here at my company. The current project I’m working on is a Node.js + React application that works perfectly fine on OSX, but encounters some issues with node_modules on production. Our Jenkins build will result in failure due to some unforeseen issue costing us time to troubleshoot and fix. Ideally we would work in an environment that mirrors production as close as possible to avoid these issues. Docker comes close to that ideal. Theoretically if our application works in a Docker container on our machines, it will also work the same in production.
Should I Use Vagrant?
Vagrant supports Docker out of the box. During the beginning stages of my research, the blogs I were reading recommended using Docker with Vagrant. After setting up Docker with Vagrant, I decided that this was unnecessary for my current project. For a one container ecosystem in an all OSX dev environment, Vagrant adds additional complexity for no real gain. There was no real need to mimic the same exact environment across everyone’s machines - our Dockerfile sufficed for this project. However, I ran into the problem of syncing files to actively develop using a running container. When an image is created, it is created with the current files and is not updated on further change. We want to sync our files to develop without rebuilding the container over and over. Vagrant helps solve this problem, but I found docker-osx-dev to be the best choice for this project. More reading on syncing local folders to a Docker container:
- http://oliverguenther.de/2015/05/docker-host-volume-synchronization/
- https://hharnisc.github.io/2015/09/16/developing-inside-docker-containers-with-osx.html
More reading on Docker vs Vagrant:
- https://stackoverflow.com/questions/16647069/should-i-use-vagrant-or-docker-for-creating-an-isolated-environment
- http://www.ociweb.com/resources/publications/sett/march-2015-docker-vs-vagrant/
- https://www.mikelangelo-project.eu/2015/10/5-steps-to-boost-your-productivity-with-vagrant-and-docker/
- http://activelamp.com/blog/devops/docker-with-vagrant/
- http://blog.scottlowe.org/2015/02/10/using-docker-with-vagrant/
How to Start Dockerizing?
How do I even start dockerizing this? It was a daunting task, but I was able to break it down over time and understand what I was doing. The first step was to install Docker via docker-machine. Docker runs natively on Linux - to run Docker on OSX, you will need Virtualbox to run the docker-machine VM. If you run into blog posts talking about boot2docker, it has been replaced with docker-machine. boot2docker was a Linux distribution made specifically to run Docker containers. I’m assuming docker-machine to be something similar.
Each shell you open, you will have to define which docker-machine VM you’re using, else you’ll run into the Can't connect to docker daemon. Is 'docker -d' running on this host? error. To avoid having to type eval "$(docker-machine env default)" over and over again in each shell I open, I just added it to my .bash_profile. This gives me access to all my docker commands. Some quick things you can type to get started:
- docker ps: Lists all your running containers
- docker ps -a: Lists all containers that exist on your system
- docker images: Lists all your images
Creating a Dockerfile
This is my Dockerfile for my Node.js project.
FROM ubuntu:14.04
MAINTAINER Brian Choy <bchoy@barbariangroup.com>

# Install needed packages
RUN apt-get update && apt-get install -y \
      curl \
      build-essential \
      python \
      zip;

# Install nvm
RUN curl https://raw.githubusercontent.com/creationix/nvm/master/install.sh | sh;

# Install node
RUN cp -f ~/.nvm/nvm.sh ~/.nvm/nvm-tmp.sh; \
    echo "nvm install 4.2.3; nvm alias default 4.2.3; ln -s ~/.nvm/versions/node/v4.2.3/bin/node /usr/bin/node; ln -s ~/.nvm/versions/node/v4.2.3/bin/npm /usr/bin/npm" >> ~/.nvm/nvm-tmp.sh; \
    sh ~/.nvm/nvm-tmp.sh; \
    rm ~/.nvm/nvm-tmp.sh;

# Install npm 3.5.1
RUN npm install npm@3.5.1 -g

# Install dependencies with symlink to make work with volume mount
RUN mkdir /app-dist && mkdir /app-dist/node_modules
ADD package.json /app-dist/package.json
RUN cd /app-dist && npm install
RUN npm rebuild node-sass

WORKDIR /src/app
ADD . .
EXPOSE 3010
CMD ["npm", "run", "dockerdev"]
Breakdown of an example Dockerfile: https://nodesource.com/blog/dockerizing-your-nodejs-applications/
This Dockerfile tells Docker how to build out an image. With the Dockerfile, all images I create can be distributed and run locally or in production and be exactly the same. The comments I have in the Dockerfile pretty much explain what I’m doing. The order of my tasks also matter due to the Docker build cache. In a nutshell, each command is cached so that step does not have to be rebuilt unless changed. This significantly speeds up building an image by not recompiling things that are not changed. However this is not perfect and sometimes you will have to rebuild an image using the –no-cache flag. ADD . . is at the end because the directory we dev in has constantly changing files.
Dockerignore
.dockerignore:
log
tmp
.elasticbeanstalk/*
.git
.gitignore
node_modules/*
Just like .gitignore, I have files that I don’t want compiled in my image. This file contains my AWS configs, node_modules, and my entire git history. Reducing bloat is always good - especially since the bandwidth used to pull images really adds up (more on Docker registries another time).
Building the Container
I built the container using the following command: docker build -t page-creator .
This builds an image with the name page-creator while ignoring everything in the .dockerignore file. You can check the images you have on your system using docker images. Each build with the same name renames the older build to a blank name.
Older Docker images eats up your hard drive space over time. You can clear out all your blank names with docker rmi $(docker images | grep \"^<none>\" | awk \"{print $3}\"). To abstract running these commands and bloating up the hard drive with old images, I changed my npm start task to run the following Docker commands: "start": "docker kill node; docker rm node; docker rmi $(docker images | grep \"^<none>\" | awk \"{print $3}\"); docker build -t page-builder .; docker run -it --name node -p 3000:3000 -p 3001:3001 -v $(pwd):/src/app --env-file=.env page-builder" npm run dev.
I kill my container first because you cannot have two containers running with the same name. After that I remove it from my list of containers (that you can see with docker ps -a) and proceed to build a new image. Next I run the container with this command docker run -d --name node -p 3000:3000 -p 3001:3001 -v $(pwd):/src/app --env-file=.env page-builder npm run dockerdev
This runs the app in detached mode (-d) and the container is named node. -p routes my local 3000 port to the docker-machine’s port 3000 and local 3000 to docker-machine 3000. -v mounts my present working directory onto the folder where my app is in the container. That way my files are synced in development. My env file is called .env and page-builder is the image I’m running. npm run dev is a custom command I made and it is the command my docker container will use to run. If no command is specified, the command specified in my Dockerfile will be run.
Troubleshooting Errors
I could have saved so much time if I knew how to properly debug my containers early on. Since this was a single container ecosystem, debugging was quite simple to me. To ssh into a container that is running, I run docker exec -it node bash. ’node’ being the name of my container. This allows me to poke around a running instance. However if my instance crashed, the first thing I do is run docker logs node to see the output that caused my error. If I need to explore the filesystem, I create a snapshot of my container and run it with bash.
# find ID of your running container:
docker ps

# create image (snapshot) from container filesystem
docker commit 12345678904b5 mysnapshot

# explore this filesystem using bash (for example)
docker run -t -i mysnapshot /bin/bash
https://stackoverflow.com/questions/20813486/exploring-docker-containers-file-system
Dealing with node_modules
The node_modules were a huge headache for me. Since I was mounting my pwd onto the container folder, my local node_modules were overwriting the ones in my application. Despite having the same version of node and npm on my local machine as the ones I’m using in my container, my application does not run. A solution would be to delete my local node_modules folder and run npm install in my container, but it is incredibly inconvenient and time consuming to reinstall my node_modules each time I want to start developing. I solved this issue with a symlink. By deleting my local node_modules and creating a node_modules folder symlinked to /core-dist/node_modules, I now do not have a local node_modules folder that points to a real directory, but exists on my Docker container. The idea is to develop solely using the Docker container so the node_modules do not have to be functioning locally. For reference: http://kevzettler.com/programming/2015/06/07/rapid_local_development_vagrant_docker_node.html
IP Issues Across the Local Machine and VM
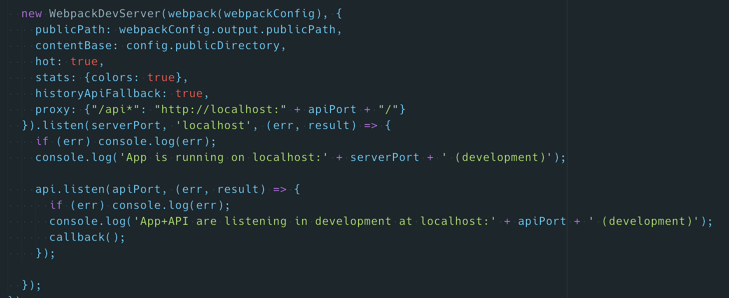
My app had a connection refused error on localhost:3000. This was an annoying one to fix because I haven’t programmed much using Node.js and I spent a good aount of time figuring out if I was facing an issue with virtual machines or with Node.js. The answer is both. My issue was localhost is not the same on the virtual machine as it is on my actual physical machine. My local server did not work because webpackdevserver was operating on localhost and as I said before, localhost on the virtual machine is different from my physical machine’s localhost. The simple fix that took me forever to figure out is to tell it to look at 0.0.0.0 instead of localhost.
Developing in Docker
Mounting my pwd does not continuously sync the files in the container. It just mounts once and creates the container. This is where Vagrant would have been a viable solution to have files synced in real time to my Docker container as I was developing. However, I found an even better solution here. docker-osx-dev is a GitHub repo that does all of those tasks for you and gives you the ability to sync your local files to docker-machine to your running containers. This way watch tasks and react hotloader work perfectly. My current workflow is to have docker-osx-dev running, rsyncing my files over to my container from my VM. If the install doesn’t work, just run it again until it works (seriously). The errors seem to resolve themselves across the three machines I’ve tested this on.
Setting up everything properly for staging and production comes next - http://www.ybrikman.com/writing/2015/11/11/running-docker-aws-ground-up/