Deploying to Elastic Beanstalk on git push with Jenkins
Here are some notes I took on how I set up my Jenkins server and deployed my application to Elastic Beanstalk on every git push.
Create new EC2 instance with Ubuntu 14.04
First create a new EC2 instance. For my server I’m using the Ubuntu 14.04 AMI - t2.micro tier
- Network: my VPC
- Security group: allowing whitelisted traffic on port 22, 80, and 443. Github’s IP is whitelisted too: 192.30.252.0/22 on ports 22, 80, 443, and 9418
Reference: https://wiki.jenkins-ci.org/display/JENKINS/
http://www.tristanwaddington.com/2012/03/installing-jenkins-on-an-ubuntu-amazon-ec2-instance/
Set up reverse proxy - https://wiki.jenkins-ci.org/display/JENKINS/Running+Jenkins+behind+Apache
wget -q -O - https://jenkins-ci.org/debian/jenkins-ci.org.key | sudo apt-key add -
sudo sh -c 'echo deb http://pkg.jenkins-ci.org/debian binary/ > /etc/apt/sources.list.d/jenkins.list'
sudo apt-get update
sudo apt-get install jenkins
sudo apt-get install apache2
sudo a2enmod proxy
sudo a2enmod proxy_http
sudo a2enmod vhost_alias
sudo a2dissite 000-default
sudo vim /etc/apache2/sites-available/jenkins.conf
<VirtualHost *:80>
    ServerAdmin bchoy@barbariangroup.com
    ServerName ec2-xxx-xxx-xxx-xxx.us-west-2.compute.amazonaws.com
    ServerAlias jenkins
    ProxyRequests Off
    <Proxy *>
            Order deny,allow
            Allow from all
    </Proxy>
    ProxyPreserveHost on
    ProxyPass / http://localhost:8080/ nocanon
    ProxyPassReverse / http://localhost:8080/
    AllowEncodedSlashes NoDecode
</VirtualHost>
sudo a2ensite jenkins
sudo service apache2 reload
sudo apache2ctl restart
sudo /etc/init.d/jenkins start
Install git and now the Jenkins server should be all set up.
sudo apt-get install git
Set up security
Manage Jenkins -> Configure Global Security
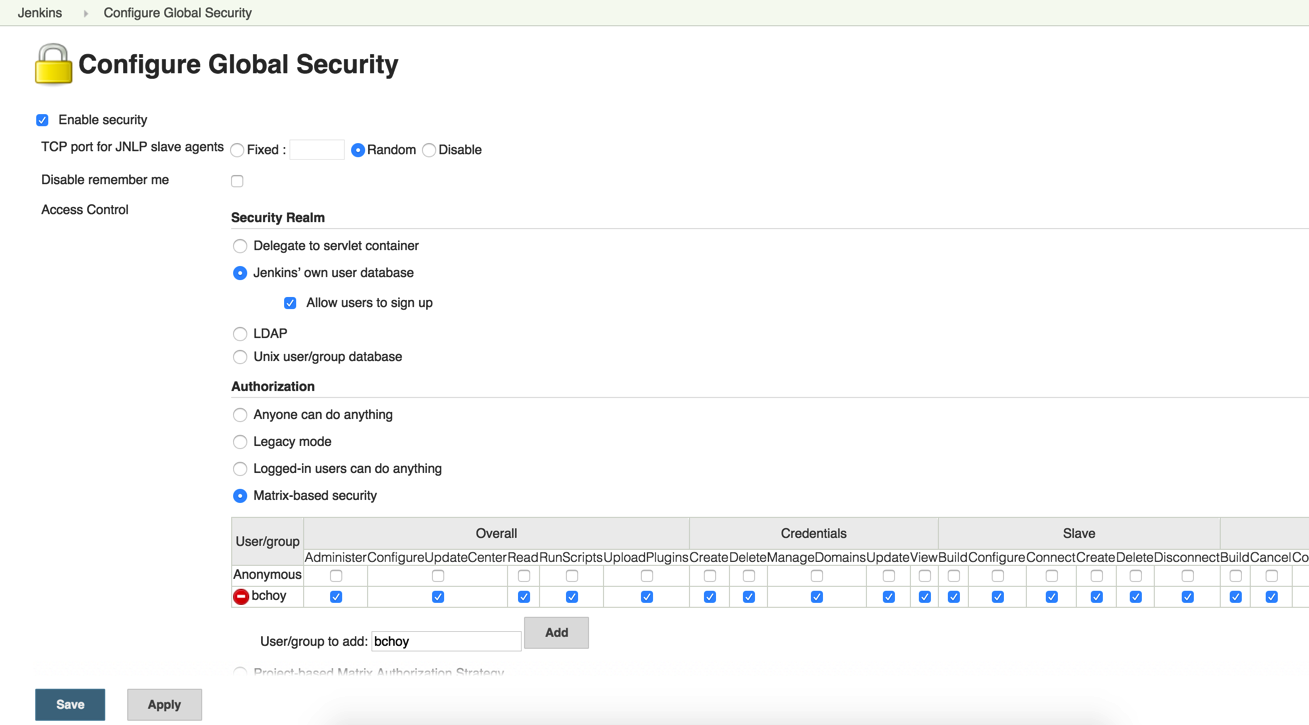
Register a new user under the same username that you created permissions for.
Back in AWS you should attach an IAM policy to the security group the app is in to access the S3 bucket and EB deployment permissions. This is my policy:
{
  "Version": "2012-10-17",
  "Statement": [
    {
      "Sid": "Stmt1446219985300",
      "Action": [
        "elasticbeanstalk:CreateApplication",
        "elasticbeanstalk:CreateApplicationVersion",
        "elasticbeanstalk:UpdateEnvironment",
        "elasticbeanstalk:DescribeEnvironments"
      ],
      "Effect": "Allow",
      "Resource": "arn:aws:elasticbeanstalk:*"
    },
    {
      "Sid": "Stmt1446158122885",
      "Action": [
        "s3:AbortMultipartUpload",
        "s3:CreateBucket",
        "s3:GetBucketAcl",
        "s3:GetBucketCORS",
        "s3:GetBucketLocation",
        "s3:GetBucketLogging",
        "s3:GetBucketNotification",
        "s3:GetBucketPolicy",
        "s3:GetBucketRequestPayment",
        "s3:GetBucketTagging",
        "s3:GetBucketVersioning",
        "s3:GetBucketWebsite",
        "s3:GetLifecycleConfiguration",
        "s3:GetObject",
        "s3:GetObjectAcl",
        "s3:GetObjectTorrent",
        "s3:GetObjectVersion",
        "s3:GetObjectVersionAcl",
        "s3:GetObjectVersionTorrent",
        "s3:ListAllMyBuckets",
        "s3:ListBucket",
        "s3:ListBucketMultipartUploads",
        "s3:ListBucketVersions",
        "s3:ListMultipartUploadParts",
        "s3:PutBucketAcl",
        "s3:PutBucketCORS",
        "s3:PutBucketLogging",
        "s3:PutBucketNotification",
        "s3:PutBucketPolicy",
        "s3:PutBucketRequestPayment",
        "s3:PutBucketTagging",
        "s3:PutBucketVersioning",
        "s3:PutBucketWebsite",
        "s3:PutLifecycleConfiguration",
        "s3:PutObject",
        "s3:PutObjectAcl",
        "s3:PutObjectVersionAcl",
        "s3:RestoreObject"
      ],
      "Effect": "Allow",
      "Resource": "arn:aws:s3:::*"
    }
  ]
}
Set up GitHub integration
Install GitHub plugin, create SSH keys on EC2 Jenkins instance as the jenkins user. Add the keys to GitHub via the reference below. Reference: https://help.github.com/articles/generating-ssh-keys/ Do everything as jenkins user: sudo su -s /bin/bash jenkins
Now we can go to Credentials -> Global credentials -> Add
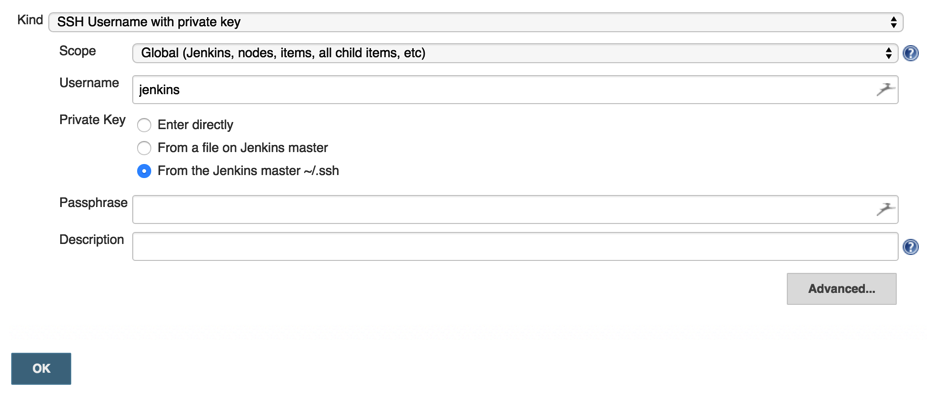
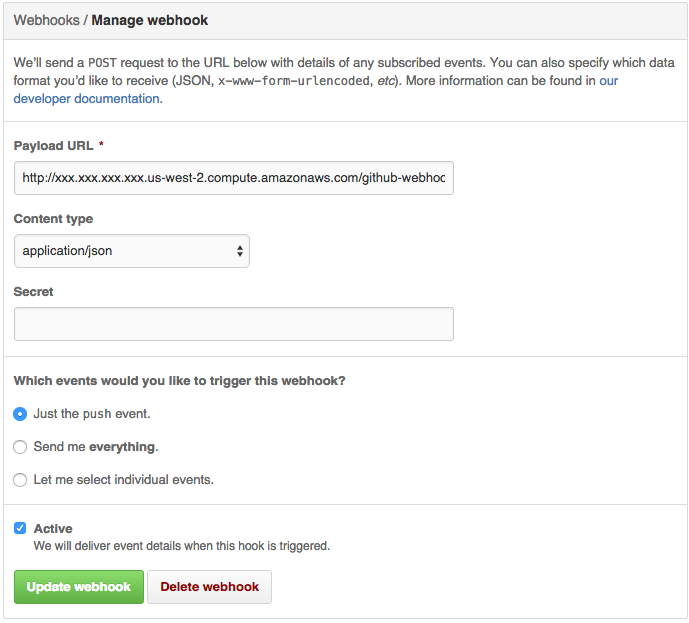
I left my passphrase blank. For some reason I couldn’t get a passphrase to work. Also now would be a good time to go to your GitHub project page, go to settings, and add a webhook which is your public IP/DNS followed by /github-webhook/.
http://ec2-xxx-xxx-xxx-xxx.us-west-2.compute.amazonaws.com/github-webhook/
Plugins to Install
- Hudson Post build task plugin
- AWS Elastic Beanstalk Deployment Plugin
- Promoted Builds Plugin
- S3 publisher plugin
- Token Macro
Create a build
- Create new jobs -> Freestyle project
- Enter the GitHub project URL
- Tick Promo builds when… and Promote immediately once the build is complete. Add Deploy into AWS Elastic Beanstalk as a build step
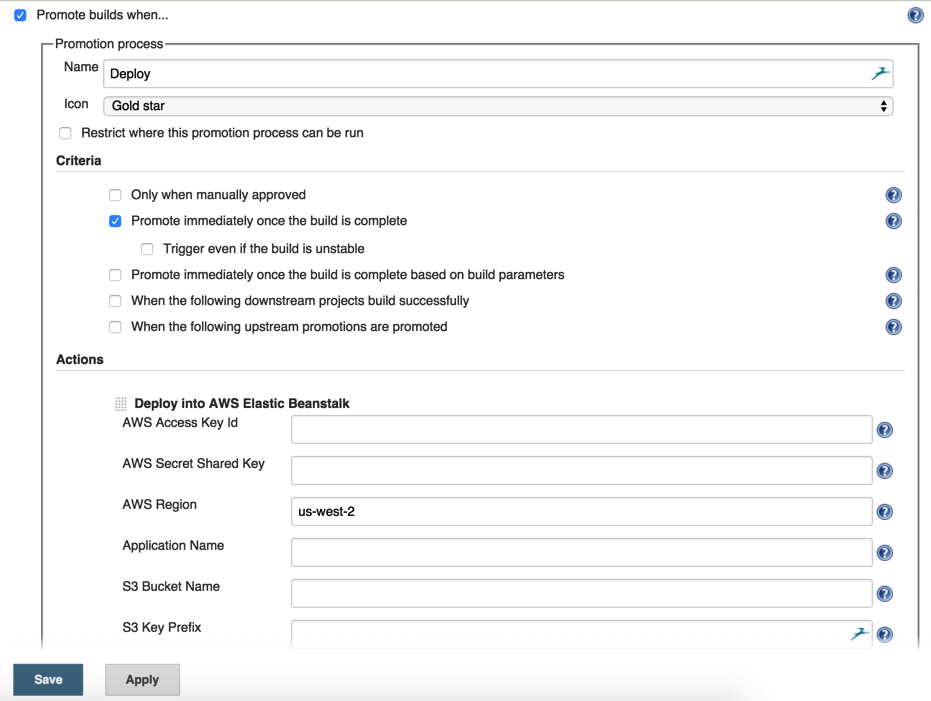
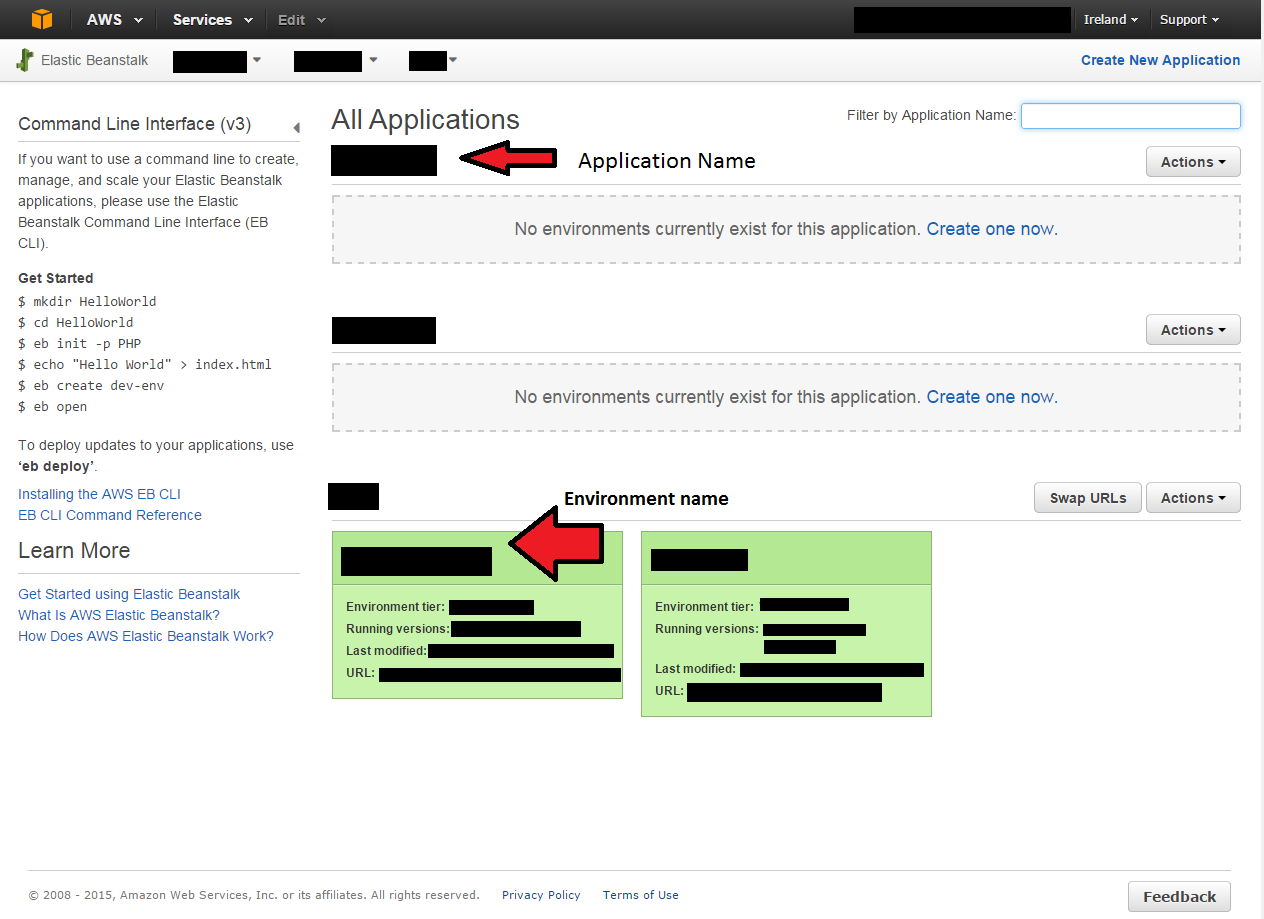
Appplication name: Elastic Beanstalk application name, not environment name
Root Object: .
Includes: \*_/_
Version Label Format: ${GIT_COMMIT}-${BUILD-TAG}
Environment name: Under application name
I couldn’t get the ${GIT_COMMIT} label to work for no good reason. I guess it’s broken. My solution is to install the Build Name Setter plugin and use the following settings:

That way I can tell which of my EB builds applies to which Git commit.