No Plex Zone

I was around 15 when I started to play around with web and game server hosting. As a result, I became interested in owning my own dedicated server, but my 5mbps down/1mbps up connection did not make me a suitable host. After moving into an apartment where I don’t pay for electricity and has Verizon FIOS, I was able to finally build my own computer and learn how to be a sysadmin.
Hardware
Doubling my main computer as a HTPC and hosting game servers on top of that only led to everyone having an inconsistent experience due to my resources being eaten up whenever I started up a game. Near 100% CPU and RAM utilization isn’t fun for anyone. I decided to build my own (dedicated) server. This was the fun part.
Since I have only built gaming rigs in the past, server grade hardware was unexplored territory. I had to research server grade motherboards, NAS drives, ECC RAM, Intel Xeon processors, etc. This was my final build after a week of research:

Not bad for an initial start. My goals for this box is to host a couple of game servers (Minecraft, Terraria) and a HTPC server. I had a 120gb SSD I was using to boot OSX on my main computer that was re-purposed as the boot drive to my dedicated. Also, I picked up a 3TB WD RED HDD from somewhere else prior to this order. I was ecstatic when I put my setup together and it ran without any hitches right off the bat.
Some stuff that I discovered when doing research on hardware:
- Intel Xeons E3s are basically i7s that have no onboard graphics, cannot be overclocked, but typically have more cores, and supports ECC RAM.
- ECC RAM. Never heard of it until I started researching server grade components. Error-correcting code memory (ECC memory) is a type of computer data storage that can detect and correct the most common kinds of internal data corruption. ECC memory is used in most computers where data corruption cannot be tolerated under any circumstances, such as for scientific or financial computing (Wikipedia). Being able to catch and correct errors is very important for data integrity, preventing application crashes, and preventing system crashes.
- SATA cables and SATA drives work perfectly fine with SAS mobo ports.
IPMI
IPMI or Intelligent Platform Management Interface is awesome. This is my first time working with an IPMI enabled motherboard, and it made setting up the computer completely painless. I don’t fully understand IPMI, nor do I utilize the majority of its features, but it basically lets me remotely turn on and off my computer over a LAN port. It also allows me full remote control and offers information from hardware sensors (temperatures).
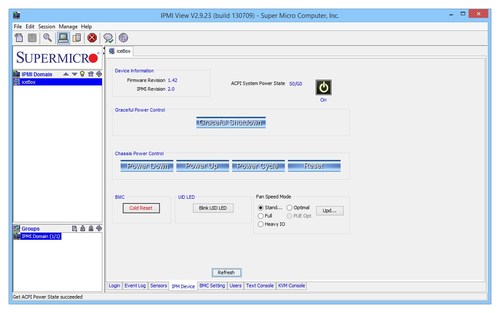
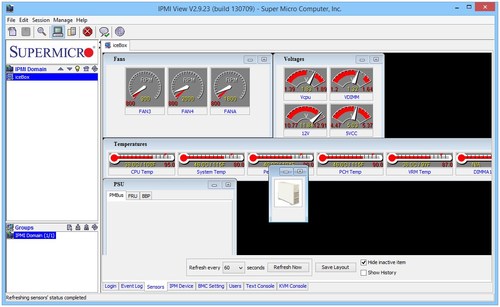
The UI isn’t top notch, but the functionality is the important thing. I was able to install my OS over the air and set up my system for SSH instead of relying on the KVM console.
SSH
Secure Shell (SSH) is a cryptographic network protocol for securing data communication. It establishes a secure channel over an insecure network in a client-server architecture, connecting an SSH client application with a SSH server. Common applications include remote command-line login, remote command execution, but any network service can be secured with SSH.
Everything I do to manage my server is through SSH. There would be absolutely no way to control my computer otherwise since it isn’t attached to a screen, keyboard, or mouse. In my simplest explanation, SSH connects you to your computer over any network and allows command line access to it as long as you’re authenticated and have your user permissions set up properly.

Data Redundancy and File Systems
Understanding this and making the right decision took the most time. Hardware research was a distant second. First off, I’m going to discuss RAID very briefly.
RAID (originally redundant array of inexpensive disks; now commonly redundant array of independent disks) is a data storage virtualization technology that combines multiple disk drive components into a logical unit for the purposes of data redundancy or performance improvement.
Hardware failures happen, and RAID levels greater than 0 are used as fault tolerance to preserve data in the event of hard disk failure. The more popularly used RAID setups are RAID0, RAID1, RAID5, and RAID6.
- RAID0: Writes to two disks with the goal of speed/performance. If one disk fails, all the data on both disk is lost.
- RAID1: Mirrors data on two disks. Data is only lost if both disks fail.
- RAID5: In setups with 3 or more disks, parity is distributed across all disks. One disk will be used to rebuild lost data if a drive fails. All data is lost if two or more drives fail.
- RAID6: Same as RAID5, but requires a total of four or or more disks, and two disks will be used to rebuild data if a drive fails. All data is lost if three or more drives fail.
Because I have 4x 3TB hard drives for my HTPC, RAID5 was the best choice for me. However, the research I’ve done led me to software RAID. Rather than spend money on a raid controller, RAID software and some operating systems offer a similar feature set. This is where things got messy. There was a lot to take in, a lot of material to read up on, and if I made the wrong choice there was a chance that I would have lost all my data switching to another RAID software. Here is a chart that helped me make my choice.
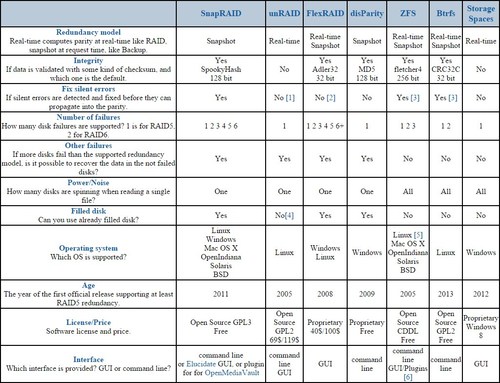
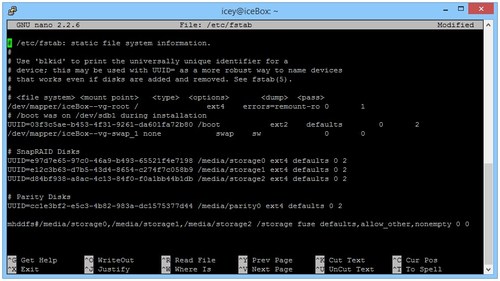
In my opinion, ZFS is the best choice when it comes to data integrity and data redundancy. It is an amazing file system that makes real time snapshots and preserves data integrity. However, it is inflexible because it does not allow me to expand my array, and the amount of RAM it uses increases as more data is added for the real time snapshots. It also keeps all the drives spinning when anything is accessed, and is simply overkill for a home server with a focus on serving media files. For my needs, SnapRAID was the best choice due to the ability to add more drives, and its low resource consumption. I have a cron job set to run every day at 2AM to take a snapshot of my data. Also, I’ve been told many times and had it drilled into my head that RAID is not a backup. SnapRAID actually advertises itself as a backup program, which I found interesting. For pooling, I decided to go with the mhddfs file system instead of AUFS.
Server Software
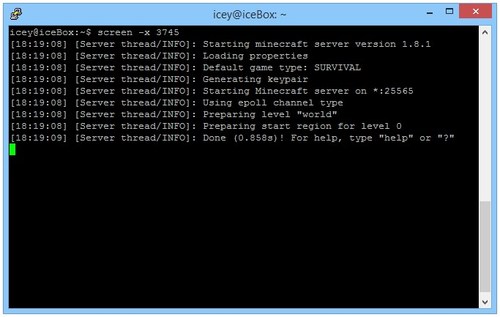
After this wall of text and pictures, I still don’t have any purpose for my server. It simply has pooled storage now. The first thing I did was set up my game servers. Steam, Minecraft, and Terraria were simple enough to get running. The problem I ran into was how I had to keep opening instances of my SSH client (Putty) to run each server, and whenever I closed my windows, the connection will terminate and my server will end. Screen addresses these issues.
Screen is a full-screen window manager that multiplexes a physical terminal between several processes, typically interactive shells.

Pretty neat. It lets me create as many “windows” as possible and detach/reattach them as I see fit.
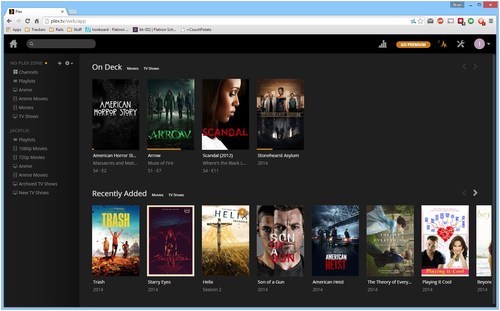
Next comes Plex Media Server, which is the best media server I’ve used because it lets me stream content to my laptop or phone, and it lets me invite other Plex users to view my media. My original goal was to host a Plex server on my main PC to stream TV shows to my girlfriend when she was on her college campus since she didn’t have a TV and could not torrent on their network. I sidetracked a bit. The “No Plex Zone” name also came from a play on words with Plex Media server and the popular Rae Sremmurd - No Flex Zone song.
Resource Management
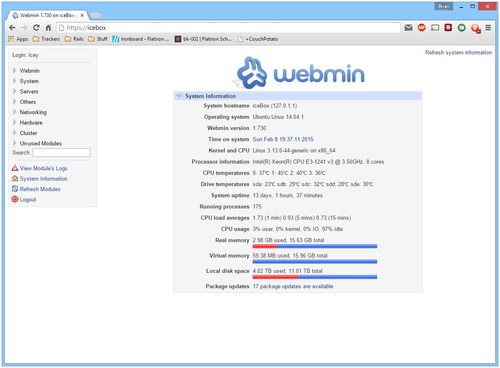
One important skill that I need to learn is how to manage system resources and react accordingly. Although there is no real load on my dedicated server, I thought it would be nice to familiarize myself with some tools in case some problems arise.
Top: See if any processes are using an abnormal amount of CPU usage. Top also shows CPU usage in relation to how many cores the process, which is why some processes report over 100% usage.

Nethogs: My network monitor to see if any of my processes is taking up an abnormal amount of bandwidth.

Sensors: View temperature on all my components. Also lets me view and control my fan speeds.

Webmin: Web interface for everything else. It’s cheating, but as a novice I find it helpful from time to time. I don’t rely on it much, and I plan to learn how to do everything via command line eventually.
Future Plans
Setting up this dedicated server was a learning experience. One of the career paths I’ve considered was being a sysadmin or a network engineer. Without formal education though, it was hard for me to enter the field. Having a box to play with taught me a lot of valuable skills. Later on in the future I wish to be comfortable enough to run servers in a business environment. Additionally, I want to learn more about security and vulnerabilities.